Renaissance Festival Outfit

Tuesday, September 24, 2013

One of my favorite events of the year runs late August through September; the Minnesota Renaissance Festival. *squeeeee*  When I was a kid we would go and dress up and have a blast.  As an adult I've learned to be much more boring and stopped dressing up.  A few years ago my friend finally convinced me to start dressing up again and it's amazeballs.  Whenever Judgey McJudger, it's awesome.  Over the years I've now accumulated a small collection of Ren Fest gear, this year I bought a new cheapy underbust corset from eBay.
It's actually not that bad.  Steel busk, supposed steel flexible boning.  And it came with a matching g-string!  So, there's that.

Anyway, because of my new-found sewing skillz, obviously I needed to amp up the ensemble.  At the Ren Fest they sell gorgeous petal skirts to lay over your basic chemise.

Okay, if you don't know anything about renaissance fancy dress, you wear a basic solid color chemise or a blouse and matching skirt. (Well, they don't have to match, but we're talking the basics here.)  Then you would wear either an under or over bust corset (self-explanatory) or you might wear a thing that's like a vest/corset with a skirt attached which would cover part of your basic skirt.  There are lots of options.  Then you can pile on the accessories from there.  Accessories tend to be expensive so you get a couple pieces a year and mix n match.  One of the pieces being a petal skirt, made of a circle of several pieces of fabric with a pointed end.

So, I wanted to make myself an overskirt to match my new corset.  I have a nice, quality fancy corset that I took borrowed from my mom, but I recently wore it for boudoir photos ("wait, wha?") so I wanted to mix it up a bit.  I found a SUPEREASY tutorial on making a square circle skirt here.  AND THEN!  Then I found another square circle skirt tutorial that showed it with a solid layer on the bottom and an organza on top.  SOLD!  I decided to make the bottom layer a solid baby blue linen, then a light purple organza top layer.  The problem was that my um circumference is a bit...circumference-y... so the skirt doesn't quite work out perfectly, but it worked fine enough.

AND THEN!  One of the recurring dilemmas I have when going to the renaissance festival is the purse issue.  I don't want to bring a modern purse because a) that totally clashes with my outfit; b) i don't want to carry a stupid purse; c) stupid purse.  Hubs doesn't want to carry around my crap either.  He has and we get our money all mixed up and everything, it's a mess.  I do have a little purse with embroidery, but it's not quite big enough.  So, handy dandy new skillz came into play.  This time I drafted my own pattern.  YEP!  I'm already that genius.  I even lined it.  It's kind of awesome.  I made myself a little drawstring pouch type purse in a navy blue rose print brocade, lined with iridescent blue/purple dupioni.  The drawstring is navy rope.  It perfectly fits my phone, keys, hand sanitizer, and money.  YAY ME!  I think I could have understitched the lining but I still hadn't grasped how to do that yet.  I wasn't planning on blogging about this so I didn't take pictures of each item, but here is a picture of yours truly at the ren fest:
I got a lot of compliments on my outfit that day.  Go me!  Another alteration I had made was to my shirt.  Last year I wore this shirt and it was all sorts of unruly.  This year I figured I would "fix" the neckline by adding a running stitch where the elastic had been and gathering it just a bit.  Well.  I don't like the outcome.  I actually really don't like how I look in any of the pictures taken of me that day.  Whatever.  Live and learn.  I think my friend will be wearing this next and she'll rock it!  I also put together Hubs' outfit who is seen in the left corner over my shoulder.  It came out super awesome!  I put it together that day.  Yeah.  That's how I roll.  For the next time I go I have some new plans in mind for myself....... stay tuned!

The Birthday Dress

Thursday, September 19, 2013

So I knew that I wanted to make myself a bright, loud, fun, tropical print dress as my first big project.  I picked out this lovely hibiscus tropical shirting at Joanns:
um, yes please. source
You should know that hibiscus is my absolute favoritest flower ever ever ever.  I would wear tropical hibiscus print all year if I could.

When looking for a pattern I knew I wanted it simple enough to look doable for me, but I also wanted a nice full skirt.  I finally landed on this one:
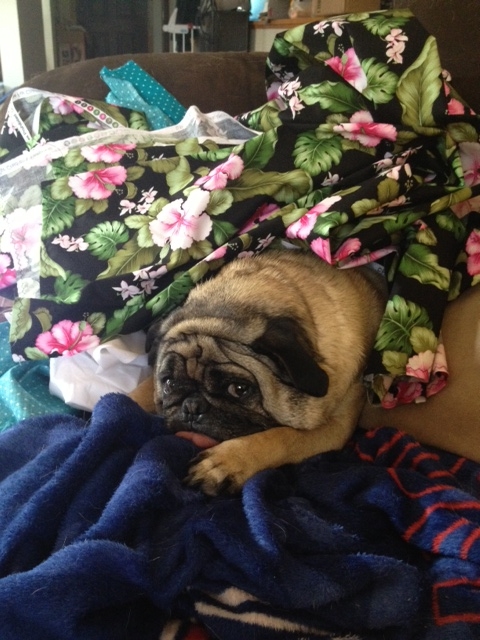
Butterick B5748.  This dress features a low scoop back, side zip, and full circle skirt.  I did view B, which is the dress without the notches and bows.  However I did alter the neckline to be a V neck instead of scoop.  V necklines just flatter me better.  I actually really like the low scoop back feature of this dress, which I did not expect.  Once I finally bought my fabric, I brought it home to pre-treat.  After washing it Lily promptly found it a great place to nap.
Well, whatever.  All my clothes are covered in animal fur anyway.

I made a muslin of the bodice to make sure it was everything I wanted (and more!) and made the alterations I wanted.  Mostly the ones as expected.  Widened the waist, shortened the straps, changed the neckline.

There were some challenges while making this dress.  The biggest one was that I could not for the life of me figure out understitching, so my lining isn't sewn down.  Then when I put it on, I realized I needed to shorten the bodice.  A lot.  Also, since I was planning on wearing a slip with this dress, I didn't fully line the skirt according to the instructions.  So I kind of winged it.  It worked fine, except where it came to the zipper.  I had trouble getting all nice and neat and where everything was supposed to be.  Eventually I made it work.  Also since I didn't line the dress according to the instructions, my lining was free flowing.  I decided to just hem it and tack it in place at the seams.  When I've worn the dress I haven't had any issues with it, so that method worked just fine for me.  Finally when it came to hemming the dress, I wasn't sure how to best hem a circle skirt.  My friend came over and helped me measure the hem from the floor up.  Google gave me a few different options so I decided to use a bias binding and hand sew the hem.  This worked perfectly.  It took me a couple nights in front of the TV to finish, and Lily kept trying to climb into my lap full of fabric, pins and a sharp needle.  But we made it work.  Here is the finished dress with my hand made crinoline underneath:
Plus a bonus shot of the back.  Pardon the crappy pictures.
It's not perfect but I certainly love it.  If I made this again I would add stay tape to the neckline to stabilize it, I think it has already stretched out a bit.  I meant to add lingerie guards to the straps but I never got around to it.  (I love dresses with lingerie guards.)  I also meant to add pockets to the side seams but I never did that either.  Now it is Fall and there are other things to sew!

My First Finished Project - Colette Patterns Sorbetto

Tuesday, September 17, 2013

Gertie's blog also introduced me to some awesome indie pattern companies, like Colette Patterns and Sewaholic Patterns.  Colette Patterns has some suuuuuper cute stuff, so I thought I might first make the Crepe dress.  This is where I found out that fabric is expensive.  It could also have something to do with my love of dresses with full skirts (full skirt = lots of yardage), but I wanted to start sewing now and I didn't have the funds to back up my desire.  So I started with a free pattern, the Sorbetto top.
Super easy, downloadable PDF.  Instant gratification!  However, just because I wanted do sew now didn't mean I was willing to give up quality.  Why sew beautiful clothes out of crappy polyester material?  Apparently anything better than polyester is hard to find at Joann Fabrics.  But hard to find doesn't mean impossible, so I checked out their website and found a nice cotton lawn to make my very first top out of.

Blogs have also taught me different types of fabric!  Cotton lawn is nice and light, perfect for a summer top.  The Sorbetto pattern only has two pattern pieces, no closures, and is finished with bias binding on the edges.  There is room for plenty of embellishments on this nice simple pattern!  Since it's the first thing I've really made, per a real pattern, I decided to make a muslin to make sure the finished product would fit me properly.

**A muslin is a test garment made with super cheap fabric (mine was a sheet from the thrift store) with just the very basic pieces sewn together enough to get an idea of fit and whether any alterations are needed.**

Knowing my measurements didn't exactly line up with the pattern sizing, I took what I learned from the blogosphere and graded between the sizes I needed.  I also added a little extra where I knew my measurements exceeded the pattern sizing.  Ah, the magic of the internet!  Learning all this nifty stuff right away.  So I altered the pattern as needed and made up my muslin.  I don't have a picture of it, but I'm definitely glad I made it.  It was entirely too big in the sides and I wanted the scoop neckline to come down lower.  I made the changes needed and proceeded to cut out my REAL fabric.  As I was adding the bias binding, it's like the fabric was magically turning into an actual top!
squeee!  i made a shirt!
Yay!!!!  I would definitely make this top again, except I need to curve the side seams a bit better so it is more flattering than boxy.  I've worn this top plenty of times for the sake of hot weather and desire for comfort.  Seriously, I feel naked when I wear this.  It is so light and airy.  I also meant to take down the hem and finish it with more bias binding because once I hemmed it the top felt too short.
In any case, I think my first "real" wearable project turned out pretty freaking okay.  Woop woop!

Sewing Studying

Thursday, September 12, 2013

Now that I have my new friend, I needed to do some hard core studying.  Somehow I stumbled upon Gertie's blog: Blog For Better Sewing.  I proceeded to read it, in it's entirety, from Gertie's very first blog post until the current post.  I was hooked.  Gertie's blog started by working her way through the original 1952 book Vogue's New Book for Better Sewing.  The book taught her all sorts of vintage styles of sewing, and her blog includes a lot of information and background on sewing/clothing from the 50s and 60s.  True to my old soul, I immediately fell in love with everything to do with her blog.  I learned a ton from reading it "back to front", things I can pride myself in that I do in a vintage technique.  I also learned plenty of sewing lingo and know that there is a great resource ready and waiting for when my skills are in line with some of Gertie's tutorials.

When I decided to learn how to sew, I knew if I went about making pillowcases that I would get bored and give up.  So I hit the ground running with a plan to make a dress.  A GORGEOUS dress.  I decided maybe to get myself familiar with my precious new machine I would first make a petticoat for my dress.  Gertie has a tutorial for a modern crinoline, which is an every day wearable petticoat just fluffy enough to give a dress a nice shape, but not so fluffy that it's costume-y.  I have to say, this was kind of cool being my first project just because it's essentially a self drafted pattern.  Working with organza wasn't, by any means, easy though.  My petticoat has since mostly fallen apart due to some "gentle" pug assistance, particularly with claws against the lace on my hem.  I'll fix it at some point.  Anyway, I made the slip piece with pink rayon, which I later also used to line the bodice of the corresponding dress.  The layers are hot pink organza trimmed with hot pink lace.  It actually wasn't my first completed project.  When I added the second layer and put it on, it was more tea length on me than knee length.  So I set it aside for a while.  Like, until my dress was done, basically.  Here is an odd picture of the slip in process:

looks kinda like lady bits
I do love the feel of rayon, and making the fluffy parts out of organza definitely help make it comfortable to wear all day and sit on.  The blogosphere has told me that tulle is itchy.  Well, no one wants that now do they?  The slip definitely makes me feel superfeminine and swingy when I wear it.  So much fun.  I think there will be more of these in my future, and probably even fluffier versions.  Here is the slip finished, before I brought up the length:
ignore the fabric on the left. that was my next project.
So there you have it.  My first project, but not my first finished project.

So, I Sew Now.

Wednesday, September 11, 2013

A couple of months ago I found a dress that I fell head.over.heels. in love with.
 source - Modcloth

I either had to have the dress, or I needed to quickly develop the skills to make about 8,000 of them myself.  Problem was, the dress was $90.  Despite my best efforts to save my precious coins, I ended up begging Hubs if he would buy it for me.  I wanted to learn how to sew it too, but a basic sewing machine costs around $100 itself, plus supplies, plus fabric, etc.  And I didn't even know if I *could* sew successfully.  Or if I would even like it.  Or maybe I would learn how, get frustrated, and give up for x y z reason.

{crickets} ...I tend to do that.

I was lucky enough to find a lovely vintage sewing machine in it's own little table off craigslist.  The owner used it only as an end table, so she was selling it for $5.  Score!  It even worked.  It just needed a little TLC.

Unfortunately, as I was giving it some TLC and testing it out, the motor started to smoke.  Oops.  My BFF Google told me that's not good and I would need to replace the motor.  Well I can't be bothered to do that, I have sewing learning to do immediately.  I will do it eventually just because vintage stuff is the bomb diggity, and I am still quite proud to be the owner of such a lovely machine.

Now, I've been able to mend stuff and sew on buttons by hand since the dawn of time.  I believe this knowledge came from my lovely grandma at some early stage of my life.  I remember when my mom learned to sew when I was about 10 and made my sister and I sweet little outfits.  She may have let me help her some, but honestly I don't remember much more than pins, a cutting mat, and spending way more time waiting while she poured over giant pattern books than a 10 year old had patience for.  It was preparing for my wedding that I suddenly really wanted to get a sewing machine, but that was another expense I just couldn't manage at the time.  So the desire has been brewing for a while now.  Finally, my sweet Hubs bought me a brand new refurbished sewing machine!
The heavens opened and shined upon my dining room table aka sewing room and the gods smiled at me.  I have a new friend.  We are quickly becoming well acquainted with each other.

More to come.

Gelous Nail Gel Coat + Orly Polishileld = A Great Manicure

Friday, June 14, 2013

Last time I had a gel manicure, I was tight on funds so I had to remove the stuff myself.  If you've ever tried this, you probably know what a PITA it can be.  I filed down the shiny part and put soaked cotton balls held by tin foil on my fingertips and waited, waited, waited.  After half an hour I still had to scrape the crap off my nails.  It took forever and was somewhat uncomfortable.  I much prefer spending $10 for someone else to take it off.  Anyway, the wonderful thing about a gel manicure is how smooooooth and shiiiiiiiny your nails are!  I just love it.  They also feel a bit thick, notice that?  I just love how a gel manicure feels and looks.  Thus started my quest for an at home faux gel manicure. 

You may have seen DIY Gel Manicure instructions from Pinterest, which is how I found Gelous Advanced Nail Gel Coat.  I attempted the DIY Gel Manicure.  It's still not as awesome as a real gel manicure, but it does come satisfyingly close enough.

First, you're going to need this:
I picked this up at Sally's Beauty Supply.  I haven't been to one in years and years and years, and had no idea where one was located near me.  Funny enough, there were two!  They were hiding in plain view.  I just had to know where they were.

So, the Pinterest directions tell you to vary the time between coats.  You paint on the Gelous, then your nail polish, then the Gelous, then nail polish, then your top coat (NOT Gelous).  BFF Google told me right away not to use Gelous as a top coat because it will stay sticky.  It's meant as a base coat.  So.  Fair warning to you.  On my first attempt I timed all my coats according to the Pinterest directions, but I found that if you don't wait until your polish is dry to the touch, then put Gelous on top, the Gelous gets all .... smeary.  Like when you put on your top coat too soon and the brush tip gets tainted with your polish color.  I painted the next coat when the previous coat was dry to the touch.  So do that.  Also make sure to cap your tips like they do at the salon.  This really does help prevent chips!

I wanted a nice slick shiny top coat, but I also wanted to make sure the shine would last more than a couple of days (like how some top coats wear off), so I picked up Orly Polishield from Ulta:
This stuff is pretty awesome.  It stays super shiny.  Orly had another super shiny promising top coat that I was tempted to buy, but I liked that Polishield promised to do it all.  As far as I can tell, it does!  Here is my manicure after 5 days:
Shiny and barely any chips!  I didn't take this picture to post on the internet, so it's not perfect.  You can see white polish at the tips because I used white under the pink (which is WAY more glowy and awesome in person {Orly Passion Fruit, the brightest and most obnoxious pink in the store}), but no chips.  I did start to get some small chips on my right hand within a couple of days of that picture though.

Another perk of this, besides not needing a UV lamp, is everything comes off with nail polish remover.  You don't need a chisel or any other special tools to get it off.  Bam!  Try it!

Trying New Things! Konad Nail Stamping

Friday, April 19, 2013

The other day I was looking for items to promote my Pink Zebra business, and I came across this lovely image...


Um...what?  I've seen the nail stickers, but being $8-11 bucks a pop I haven't been willing to spring for them.  This design, however, was done by nail stamping.  Obviously I immediately looked it up on YouTube, followed by a prompt purchase on Amazon.

I bought a kit which included the stamper, swipey blade thing, and the M69 plate which features the zebra print.  Only $11 with free shipping - SCORE!  Fast shipping at that!  My kit was in my paws within a few days and off I went on my first nail stamping experience. 

I used the prettiest, brightest, most obnoxious flamingo pink I could find at Ulta for my base coat.  Orly Va Va Voom.  This is a matte color, and YouTube suggests doing a clear coat under the design anyway, so I topped it with a basic clear to make it shiny.


I didn't want to try the zebra print right away because I want to sport it at my first Pink Zebra vendor show, so I chose the swirly print next to the zebra option.  Actually I'm not a huge fan of the other options on the M69 plate, but I think this plate will be my gateway drug to a plate collection.  Here are the items laid out:


For the design I picked a solid white, which I realized I need to throw away.  It was workable but I think a newer polish would be easier to manage.  Not that stamping wasn't easy, in fact I was super surprised at how easy it was!  All you do is load up the design you want to use with the polish, scrape the excess to the side with the blade thingy, roll the stamper over the design to pick it up, then roll the stamper on your nail to transfer it.  It's really quite cool how it works.  I don't know if it's just that my nail polish was so old, but the design comes right off the stamper when it goes onto your nail.  I did rub my stamper on a cotton round with nail polish remover in between nails, just to make sure each nail had a nice clean design.  I topped the design with another clear coat.  Here is the finished product!

(neon colors never show up as vibrant in pictures.  shame, this is so bright and pretty!!!)

You can see that a couple of my nails show beginner's experience (my left thumb and right middle finger), but overall I think it came out pretty damn cool, especially for my first try.  I cannot WAIT to do a zebra design for my vendor show.  I just have to figure out what combination of colors to use!  So many possibilities!!!